







 GET QUOTE
Home / Editorial / Choosing the Right Kitchen Layout for Your Home

17 Aug 2026
Choosing the Right Kitchen Layout for Your Home
Embarking on the architectural design or comprehensive renovation of a kitchen represents one of the most critical structural and financial decisions a homeowner will make. The kitchen is no longer an isolated service compartment tucked away at the rear of the home; in contemporary British residential architecture, it serves as the central operational engine, social hub, and primary aesthetic anchor of domestic life. Yet, when confronted with the myriad spatial options available—from narrow Victorian galley corridors to sweeping open-concept island configurations—it is remarkably easy to become overwhelmed by superficial surface trends while overlooking the underlying physics of spatial ergonomics. A poorly planned kitchen layout introduces daily friction: blocked dishwasher clearances, excessive walking distances between storage and cooking zones, inadequate food prep landing surfaces, and hazardous bottlenecks. Conversely, selecting the right layout transforms culinary tasks into an intuitive, seamless experience. In this exhaustive technical guide, we examine the principles of choosing the right kitchen layout for your home, analyzing the classic working triangle, anthropometric clearance standards, carcass joinery substrates, and long-term capital property appreciation.
Key Takeaway: The Architectural Formula for Kitchen Layout Selection
Choosing the right kitchen layout requires harmonizing four core spatial disciplines: Working Triangle Optimization: Ensuring the cumulative distance between the refrigeration center, prep sink, and cooking hob measures between 4.0m and 7.9m without cross-traffic disruption; Circulation Corridor Clearances: Maintaining a minimum of 1050mm for single-cook walkways and 1200mm for multi-cook island zones; Volumetric Joinery Integration: Utilizing 18mm–22mm Moisture-Resistant MDF (MR MDF) full-height cabinetry to recapture vertical storage up to ceiling cornices; and Capital Value Return: Delivering an estimated 4% to 8% capital valuation uplift on UK residences according to property appraisal standards documented by the Royal Institution of Chartered Surveyors (RICS).
Understanding Your Lifestyle and Needs: Anthropometrics and Daily Ergonomics
Before drafting floor plans or selecting cabinet door profiles, a homeowner must conduct a thorough diagnostic evaluation of how their household actually operates. Kitchen planning is not an exercise in placing decorative boxes against walls; it is the science of spatial anthropometrics—calibrating physical dimensions to human body movement, task frequency, and lifestyle habits.
1. Household Composition and Cooking Frequency
The demands placed upon a kitchen vary dramatically depending on household demographics:
- The High-Volume Family Household: Requires distinct preparation and clean-up zones, a secondary under-counter vegetable prep sink, child-safe induction cooking surfaces, and expansive 1200mm circulation paths to prevent collisions when refrigerator and dishwasher doors are opened simultaneously.
- The Culinary Enthusiast or Home Baker: Prioritizes dedicated counter runs (at least 1200mm of uninterrupted worktop), specialized storage for heavy countertop mixers, a professional extraction hood operating at 650m³/hr or higher, and double eye-level pyrolytic and steam ovens.
- The Executive Entertainer: Demands an open-plan island layout that directs guest seating away from active cooking zones, featuring integrated dual-zone wine coolers, flush-mounted pop-up power towers, and quiet dishwashers operating under 40dB.
2. The Science of the Architectural Working Triangle
Developed originally by the University of Illinois School of Architecture, the "working triangle" remains the cornerstone of kitchen planning. The triangle links the three primary work centers:
- The Food Storage Hub: Refrigerator, freezer, and dry-goods tall larder.
- The Preparation & Washing Hub: Undermount sink, waste/recycling pull-outs, and dishwasher.
- The Cooking Hub: Induction hob, wall ovens, and microwave.
To achieve optimal efficiency without physical exhaustion:
- Each leg of the triangle should measure between 1.2 meters and 2.7 meters.
- The total perimeter sum of the three legs must sit between 4.0 meters and 7.9 meters.
- No major circulation pathway, tall cabinet bank, or island edge should sever any leg of the triangle by more than 300mm.
| Spatial / Ergonomic Zone | Minimum Building Standard | Architectural Recommended Standard | Functional & Safety Purpose |
|---|---|---|---|
| Single-Cook Walking Corridor | 900mm | 1050mm – 1100mm | Allows safe passage past open base drawers without side-stepping. |
| Multi-Cook / Island Aisle | 1050mm | 1200mm | Permits two individuals to work back-to-back without physical interference. |
| Primary Prep Counter Run | 600mm width | 900mm – 1200mm uninterrupted width | Accommodates cutting boards, prep bowls, and food staging safely. |
| Hob Landing Zones | 300mm each side | 400mm left / 500mm right | Prevents pan handles from overhanging walkways and provides hot-pot staging. |
| Dishwasher Front Drop Clearance | 750mm | 1000mm – 1050mm | Allows full door drop down plus user standing room to load from side. |
To examine how tailored joinery configurations adapt to lifestyle demands across master bedrooms and dressing suites, explore our guide on planning custom fitted wardrobes and our regional expertise in fitted kitchens in Harrow.
Types of Kitchen Layouts: Comprehensive Structural Analysis
Every kitchen layout typology presents specific spatial characteristics, load parameters, and circulation trade-offs. Selecting the correct layout depends entirely on the architectural footprint of your property.
| Layout Typology | Best Architectural Applications | Primary Ergonomic Advantage | Critical Design Constraint |
|---|---|---|---|
| Galley (Parallel Corridor) | Victorian outriggers; narrow urban rooms (<3.2m wide) | Highest culinary efficiency; ultra-short working triangle steps | Risk of high-traffic bottlenecks; limited social seating |
| L-Shaped Configuration | Medium rooms; open-plan kitchen-diner extensions | Eliminates through-traffic; easily incorporates central dining table | Creates one blind corner cavity requiring specialized mechanisms |
| U-Shaped Layout | Enclosed square rooms; high-storage family kitchens | Maximum worktop continuity; envelops the cook efficiently | Generates two blind corners; requires ≥2.4m width between runs |
| Central Island Layout | Expansive contemporary extensions (≥4.2m room width) | Multi-cook zoning; social entertaining; clear task segregation | Demands large footprint; high cost for subfloor services |
| Single-Wall (Linear) | Studio lofts; compact open-plan apartments | Zero floor footprint waste; minimalist aesthetic | Long linear walking lines; limited food preparation counter space |
1. The Galley Kitchen: The Chef's Efficiency Standard
Named after the ultra-compact food prep corridors found on ships and trains, the galley kitchen comprises two parallel runs of base and wall cabinetry facing each other across a central aisle. For dedicated home cooks, the galley remains the undisputed benchmark for operational efficiency:
- Minimizing Unnecessary Footwork: Because storage, prep, and cooking surfaces sit immediately opposite one another, the cook can transition between the sink, refrigerator, and hob with a simple 180-degree pivot step.
- Clearance Tolerances: The central aisle must maintain a minimum clear width of 1050mm to 1200mm. An aisle narrower than 1000mm prevents opposing base drawers from opening fully, while an aisle wider than 1500mm wastes physical energy by expanding step counts.
- Visual Expansion Strategies: In long, narrow Victorian galley layouts, installing full-height cabinetry on one side while keeping the opposite side open with floating shelves or wall-hung shallow units (300mm deep) prevents the room from feeling tunnel-like.
2. The L-Shaped Kitchen: Flexibility and Social Integration
The L-shaped layout utilizes two adjacent, perpendicular walls to form a natural corner. This configuration is widely specified in modern British semi-detached refurbishments and open-plan kitchen-diner extensions:
- Eliminating Traffic Cross-Flow: Because cabinetry is anchored to two walls, the remaining two sides of the room remain open. Household members can move through the room without crossing the cook's preparation zone.
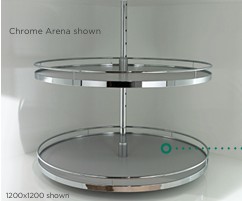
- Managing the Blind Corner: The intersection of two 600mm base cabinet runs creates a deep 900mm × 900mm corner void. Leaving this space with a fixed shelf creates an inaccessible black hole. Incorporate articulating pull-out trays (such as LeMans II mechanisms) that glide completely clear of the carcass to bring heavy cookware into full reach.
3. The U-Shaped Kitchen: Maximum Countertop Continuity
Featuring three connected walls of cabinetry, the U-shaped layout envelops the user in a continuous horseshoe of workspace. It is ideally suited for enclosed rooms where maximizing worktop surface and cabinet storage is paramount:
- The Independent Triangle: The U-shape allows each point of the working triangle to occupy its own dedicated wall: refrigeration along Wall A, prep and sink along Wall B, and cooking hobs along Wall C.
- Dimensional Prerequisites: To function comfortably, a U-shaped kitchen requires a minimum internal room width of 2.4 meters. This accommodates two 600mm-deep perimeter base runs while preserving an essential 1200mm central circulation well. Rooms narrower than 2.4 meters will feel constricted and trap heat.
4. The Island Layout: The Modern Entertaining Standard
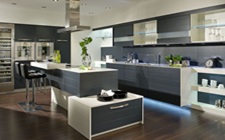
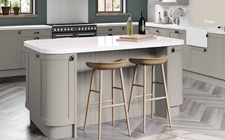
In contemporary residential architecture, the kitchen island serves as a multifunctional monolith: food preparation station, informal breakfast bar, spatial room divider, and social hub:
- Scale and Proportion: An island must never overwhelm the room. Maintain at least 1050mm to 1200mm of clear floor aisle around the entire perimeter of the island. The island itself should measure at least 900mm deep (if incorporating seating) and 1800mm wide to look balanced.
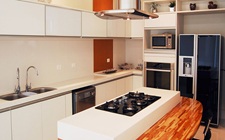
- Service Integration: If locating a cooking hob on the island, specify an induction cooktop with an integrated downdraft extraction motor to avoid hanging a bulky overhead chimney hood that obstructs open sightlines. If incorporating the primary sink, allow 400mm of landing counter on both sides of the basin.
"A kitchen layout should direct the flow of family life without interrupting culinary tasks. An island must act as a welcoming social bridge, never a physical barrier between the cook and the pantry."
— Kitchen Planning Guidelines & Architectural Clearances Consensus
To see how architectural cabinetry layouts are executed in practice, browse our technical resource on modern kitchens in Harrow and our luxury portfolio of bespoke walk in wardrobes.
Measuring Your Kitchen: Precision Architectural Diagnostic Protocols
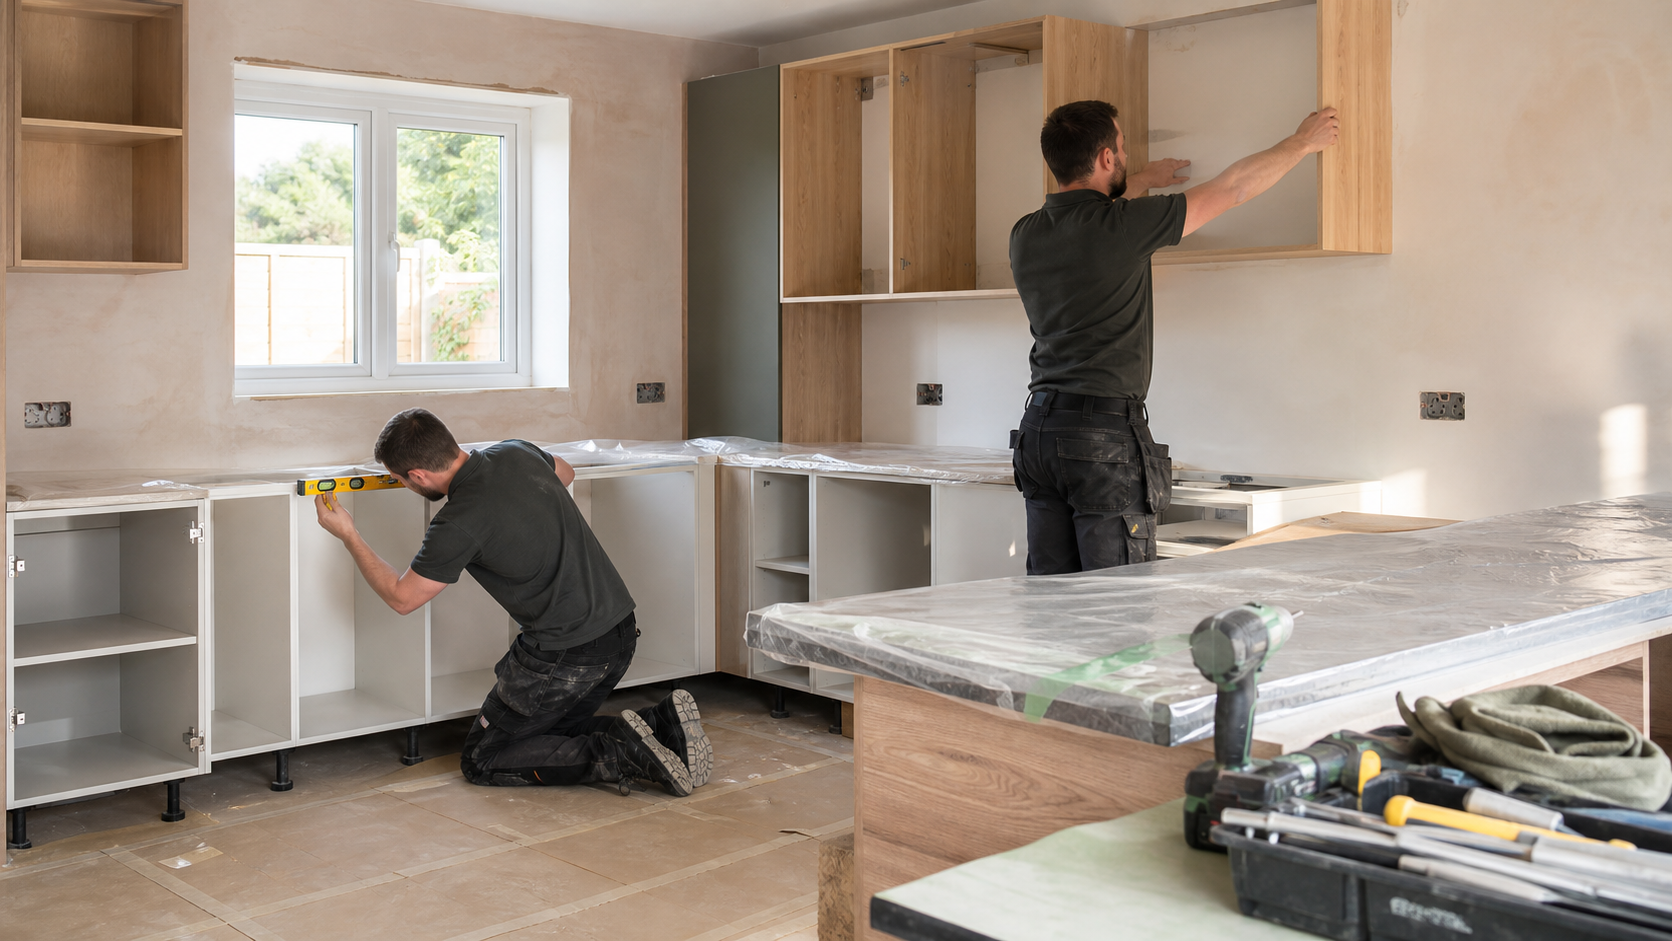
Layout failure occurs most frequently when homeowners design around nominal room dimensions rather than verified physical field measurements. A millimeter discrepancy on paper compounds across a 4-meter cabinetry run, resulting in doors that hit architraves, stone worktops that fail to fit out-of-square walls, and filler panels that look uneven.
1. Multi-Level Perimeter Laser Surveying
Execute a disciplined diagnostic survey using a commercial-grade digital laser distance meter and a 1200mm digital spirit level:
- Three-Tier Width Verification: Measure wall spans at 100mm above finished floor level (kickboard height), 900mm (worktop counter height), and 2100mm (wall unit hanging level). Plasterboard and masonry walls often bulge outward in the middle, narrowing the usable space by 15mm to 30mm.
- Floor and Ceiling Deflection Checks: Check floor levels across the room span. Historic joist deflection can create a 25mm drop across 3 meters, which must be leveled using adjustable cabinet legs rather than packing under worktops.
- Corner Squareness Verification: Use a digital angle finder on all internal corners. Any corner deviating from 90 degrees requires bespoke cabinetry with integrated 25mm–35mm scribe margins that fitters plane on site to mirror the wall.
2. Mapping Structural and Utility Obstructions
Document every fixed structural element before finalizing appliance positions:
- Plumbing Waste and Soil Stacks: Sink placement is dictated by the fall of the primary waste pipe (minimum 1:40 gradient). Relocating a sink across the room may require coring through exterior masonry walls or raising floor joists.
- Gas and High-Amp Electrical Feeds: Modern flex-induction hobs demand dedicated 32-amp or 40-amp electrical circuits. Confirm consumer unit capacity early.
- Window Cill Clearances: Verify the distance from the finished subfloor to the underside of window cills. If the cill sits lower than 900mm, standard 910mm base cabinets will block the window frame, requiring specialized low-height joinery or window modifications.

Incorporating Storage and Functionality: Joinery Engineering
A kitchen layout is only as good as its interior cabinet mechanisms. Outdated static shelves waste significant internal volume and force uncomfortable bending.
| Storage Mechanism | Standard Retail Specification | Architectural Bespoke Joinery Standard | Ergonomic & Volume Advantage |
|---|---|---|---|
| Base Cabinet Storage | Single static 15mm chipboard shelf | Full-extension tandem drawers (Blum Legrabox) | Brings contents out into the room; 50kg–70kg load rating per drawer. |
| Blind Corner Access | Inaccessible void or basic plastic carousel | Articulating twin-shelf pull-out (LeMans II system) | Recaptures 100% of blind corner volume; trays pull fully out. |
| Pantry Storage | Deep wall cupboards requiring rummaging | Full-height tandem pull-out larder (Kesseböhmer) | Dual-sided access to dry goods; holds up to 120kg payload smoothly. |
| Countertop Appliances | Exposed appliances consuming prep surfaces | Pocket-door appliance garage with internal power | Conceals coffee machines and toasters behind flush sliding doors. |
1. The Superiority of Deep Tandem Drawer Runs
Modern kitchen architecture replaces static base cupboards with banks of deep, full-extension tandem drawers. Operating on concealed undermount slides with fluid-damped soft-close action, these drawers pull out completely, giving you full view of pots, pans, and dry goods from above without crouching.
2. Pocket-Door Appliance Garages
Small countertop appliances—such as espresso machines, stand mixers, and toasters—frequently clutter worktops. An appliance garage conceals these tools behind bi-fold pocket doors that slide back into side carcasses when open. Equipped with quartz worktops, internal task lighting, and integrated electrical sockets, appliances remain plugged in and ready to use, then disappear behind clean cabinetry facades when finished.
To inspect material finishes, soft-close hardware, and door profiles in person, plan a visit to our West London fitted cabinetry showroom, or review our company heritage on our about us page.
Budgeting and Financial Allocation: Maximizing Long-Term Capital ROI
A kitchen renovation requires disciplined budget planning to ensure that funds are directed where they provide the greatest functional return, rather than being absorbed by cosmetic additions.
| Project Category | Recommended Budget Allocation | High-Yield Priority Focus | Value-Engineering Strategy |
|---|---|---|---|
| Cabinetry & Joinery | 40% – 50% | 18mm MR MDF carcasses; soft-close tandem runners | Standard exterior door styles paired with premium internal running gear |
| Worktops & Stone Slabs | 15% – 20% | 20mm–30mm engineered quartz or sintered stone | High-pressure compact laminate on perimeter runs with quartz island |
| Cooking & Extraction Appliances | 15% – 20% | Flex-induction hob and pyrolytic steam oven | Mid-tier appliances from tier-one manufacturers sharing core motors |
| Installation & Trades | 15% – 20% | Certified master fitters; Gas Safe & NICEIC trades | Maintain original plumbing and gas pipe positions where possible |
| Contingency Reserve | 10% | Held strictly for subfloor levelling and electrical upgrades | Non-negotiable buffer; absorbs unexpected structural adjustments |
The 50/30/20 Budgeting Framework
To keep your renovation financially sound, adopt a disciplined 50/30/20 allocation framework:
- 50% to Primary Functional Infrastructure: Carcasses, heavy-duty drawer runners, primary worktops, and foundational installation by skilled tradespeople. These elements form the permanent bones of the room and cannot be easily swapped out later.
- 30% to Appliances and Fixtures: Induction hobs, extraction units, refrigeration, sinks, and taps. Focus on reliability, quiet decibel ratings, and energy efficiency.
- 20% to Lighting, Decorative Finishes, and Contingencies: Task lighting channels, splashback tiling, wall decor, and a mandatory 10% contingency reserve to cover unexpected plumbing or electrical updates uncovered during site strip-out.
To review verified client transformations and explore design possibilities, visit our client feedback and reviews hub and browse our collections on Xeeni Buy Online.
Common Mistakes to Avoid When Choosing a Kitchen Layout
Designing a kitchen involves coordinating structural, mechanical, and electrical trades. Avoiding these common planning mistakes prevents project delays and ensures lasting culinary efficiency:
- Allowing Islands to Obstruct the Working Triangle: Placing a large preparation island directly in the walking path between the refrigerator and the sink creates daily frustration. Maintain uninterrupted movement lines between your core prep, wash, and cook zones.
- Overlooking Appliance Door Clearances: Installing an oven or dishwasher too close to an internal corner means its door will hit adjacent cabinet handles when opened. Always allow at least a 75mm filler offset at internal corner intersections.
- Ignoring Hob Landing Clearances: Installing an induction hob flush against a tall larder or side wall leaves no space for pan handles and creates a fire risk. Always maintain at least 400mm of open, heat-resistant worktop on either side of the hob.
- Specifying Inadequate Task Lighting: Relying solely on central ceiling downlights casts dark shadows over your hands when leaning over prep counters. Always specify continuous warm 2700K–3000K LED strip profiles recessed beneath wall cabinets to cast even, shadow-free light across work surfaces.
- Underestimating Appliance Extraction Requirements: Open-plan living spaces demand high-performance extraction. Installing an underpowered, noisy cooker hood (operating at 60dB or higher) makes conversation impossible. Choose quiet extraction hoods rated below 42dB with airflow capacities of at least 650m³/hr, or select induction hobs with integrated downdraft extraction.
Master Technical Checklist for Kitchen Layout Planning
Use this phased architectural checklist to guide your kitchen layout project from initial survey to final handover:
Phase I: Survey, Anthropometrics & Triangle Mapping
- Execute a multi-point laser survey recording room width, depth, and ceiling heights at three levels.
- Verify the working triangle perimeter measures between 4.0m and 7.9m without cross-traffic disruption.
- Check floor joist deflection and confirm internal corner squareness using a digital level.
- Map all structural utilities: soil stack gradient, electrical distribution board, and gas feeds.
Phase II: Clearance & Cabinetry Specification
- Verify minimum 1050mm single-cook and 1200mm multi-cook island walking aisle clearances.
- Specify 18mm Moisture-Resistant MDF (MR MDF) carcasses with waterproof PUR edge-banding.
- Incorporate full-extension soft-close tandem drawer slides rated for 50kg–70kg dynamic loads.
- Install articulating twin-tier pull-out trays (such as LeMans II systems) in all blind corner cavities.
Phase III: Environmental Balancing & Handover
- Install continuous warm 2700K–3000K LED task lighting profiles beneath wall units (CRI >90).
- Select non-porous 20mm–30mm engineered quartz or sintered stone surfaces to prevent acid etching.
- Ensure kitchen ventilation extracts at ≥650m³/hr while maintaining acoustic operation below 42dB.
- Hold a dedicated 10% contingency reserve strictly for unexpected subfloor and electrical upgrades.
Design Your Bespoke Kitchen Layout
Ready to transform your home with a custom kitchen layout engineered around your lifestyle? Schedule a free 3D design consultation with our senior CAD specialists to receive an itemized proposal and tailored layout plan.
Book Your Design ConsultationFrequently Asked Questions
What are the different types of kitchen layouts?
The primary kitchen layout typologies include the single-wall straight layout, parallel galley corridor, L-shaped configuration, U-shaped perimeter layout, and open-concept island/peninsula floor plans, each delivering specific clearance parameters and storage efficiencies.
How do I choose the right kitchen layout for my home?
Selecting the optimal layout requires mapping the architectural envelope with a multi-point laser survey, calculating the total distance of the cooking working triangle (maintaining between 4.0m and 7.9m cumulatively), evaluating household meal preparation volume, and respecting strict 1050mm–1200mm walkway clearances.
What are the benefits of each kitchen layout?
Galley kitchens deliver the highest task efficiency in narrow footprints; L-shaped layouts excel in corner efficiency and open-plan dining integration; U-shaped configurations maximize uninterrupted worktop surface and storage density; and island layouts provide multi-cook zoning and social entertaining capabilities.
How do I measure my kitchen for a layout?
Measure room perimeter dimensions at three distinct vertical levels (floor, 1200mm, and ceiling height) using a digital laser meter. Verify wall verticality with a 1200mm spirit level, and map the precise locations of soil stacks, water supply lines, electrical consumer outlets, radiator clearances, and window sill heights.
What are the common mistakes to avoid when choosing a kitchen layout?
Critical mistakes include creating bottleneck circulation corridors under 1000mm, interrupting the primary path between the sink and hob with an oversized island, placing cooking hobs directly adjacent to corners without landing zones, and under-budgeting for first-fix service re-routing.
How do I incorporate storage and functionality into my kitchen layout?
Incorporate functionality by replacing static base cabinet shelves with full-extension tandem drawers rated for 50kg loads, installing articulating twin-tier trays (such as LeMans mechanisms) in blind corners, extending cabinetry to ceiling cornices, and creating dedicated breakfast pantries.
What are the latest kitchen layout trends in the UK?
Leading trends focus on hidden architectural kitchens featuring pocket-door pantry enclosures, induction cooktops with integrated downdraft extraction that eliminate overhead hoods, curved ergonomic island contours, and sustainable zero-VOC waterborne spray lacquers.
How do I balance aesthetics and functionality in my kitchen layout?
Balance aesthetics and utility by adopting the 60-30-10 interior rule: anchor 60% of surfaces in timeless architectural cabinet finishes, 30% in tactile stone worktops and flooring, and 10% in accent ironmongery, backed by zoned task and ambient circadian illumination.