














 GET QUOTE
Home / Editorial / Kitchen Renovation Timeline: What Homeowners Should Expect

26 Oct 2026
Kitchen Renovation Timeline: What Homeowners Should Expect
Kitchen Renovation Timeline: What Homeowners Should Expect
Search Intent: Informational / Commercial Investigation (Homeowners planning or embarking on a kitchen remodel seeking realistic trade schedules, lead times, cost data, and risk mitigation strategies).
Last Updated & Verified: August 13, 2026
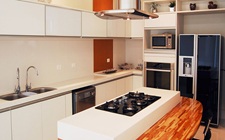
Figure 1: A completed high-end kitchen transformation featuring precision handleless cabinetry and solid stone surfaces.
A kitchen renovation is widely recognized as one of the most rewarding home improvement projects you can undertake. According to the Royal Institution of Chartered Surveyors (RICS), a professionally executed kitchen remodel can yield a return on investment (ROI) of between 50% to 80% while boosting overall property market value by up to 10%[1]. However, it is equally notorious for being logistically demanding and potential-stress-inducing. The secret to a successful, drama-free transformation lies in establishing a clear, realistic, and meticulously planned kitchen renovation timeline before demolition begins.
One of the most common misconceptions among homeowners is assuming that a kitchen renovation begins when contractors arrive to tear down old cabinets. In reality, site demolition represents only the midpoint of a comprehensive kitchen remodeling journey. Long before power tools are plugged in, weeks—and often months—of crucial groundwork must take place, from defining spatial ergonomics and locking in bespoke unit manufacturing to securing planning permissions and hiring specialized trade contractors.
How long does a kitchen renovation actually take? While quick-fix television shows suggest a brand-new space can pop up in a fortnight, a realistic full-scope kitchen renovation timeline ranges from 12 to 24 weeks total. The actual on-site build phase typically accounts for 6 to 10 weeks of this duration, depending on structural interventions, custom joinery, and material selections[2].
Key Industry Benchmarks: Kitchen Renovation Breakdown
- Total Project Duration: 12 – 24 Weeks (Concept to Handover) [cite: RICS 2025 Study]
- Active On-Site Build Phase: 6 – 10 Weeks [cite: KBSA Trade Guidelines]
- Cabinet Manufacturing Lead Times: Flat-pack (1-2 wks) | Custom UK (4-6 wks) | German Engineered (6-12 wks)
- Average Recommended Contingency: 15% to 20% of total project expenditure [cite: NAEA Propertymark]
- Solid Stone Templating Lead Time: 7 to 10 working days between measurement and installation
At a Glance: The Master Kitchen Renovation Schedule
Before diving into the detailed step-by-step breakdown, review this high-level summary table mapping out the typical timeline for a complete, professional kitchen remodel:
| Phase | Stage Name | Estimated Duration | Primary Focus & Key Deliverables |
|---|---|---|---|
| Phase 1 | Research, Ideation & Budgeting | Weeks 1 – 4 | Wishlist development, budget setting (+20% contingency), showroom visits. |
| Phase 2 | Design, Hiring & Site Surveys | Weeks 5 – 8 | Architect/designer hiring, laser site survey, layout drafts, 3D renders, appliance selection. |
| Phase 3 | Permissions & Material Orders | Weeks 9 – 12 | Building control/planning, placing cabinet orders (6-12 wk lead time), worktop selection. |
| Phase 4 | Site Prep & Demolition | Week 13 (Site W1) | Temporary kitchen setup, waste skip delivery, old cabinet tear-out, wall stripping. |
| Phase 5 | First-Fix Trades & Structural | Weeks 14–15 (Site W2-3) | RSJ steel installation, rough-in plumbing, electrical cabling, wall plastering, subfloors. |
| Phase 6 | Cabinetry & Worktop Templating | Weeks 16–17 (Site W4-5) | Dry fitting cabinets, leveling carcasses, laser templating solid stone worktops (7-10 day wait). |
| Phase 7 | Second-Fix Trades & Flooring | Weeks 18–19 (Site W6-7) | Flooring laying, stone top fitting, appliance wiring/plumbing connection, tap hookups. |
| Phase 8 | Splashbacks, Decorating & Snagging | Weeks 20–21 (Site W8-9) | Tiling/glass splashbacks, painting walls, joinery adjustment, snag list clearance, handover. |
Phase 1: Research, Ideation, and Budgeting (Weeks 1 – 4)
Focus: Laying the strategic foundation, discovering design direction, and establishing financial boundaries.
Every successful kitchen renovation begins long before any contractor enters your home. The first month is dedicated to research, clarifying lifestyle requirements, and setting a rock-solid financial strategy. Rushing through this stage almost guaranteed leads to expensive scope changes, budget overruns, and regret down the road.
1. Defining Your Practical Needs vs. Aesthetic Wishlist
Begin by analyzing how your current kitchen functions—and where it fails. Ask yourself critical questions:
- Is the primary issue a lack of physical storage space or poor spatial organization?
- Do multiple people cook at the same time, creating bottlenecks around the sink or range?
- Is the kitchen disconnected from the main living and dining spaces?
- Do you host large family gatherings or require quiet seating for remote work and breakfasts?
Distinguish clearly between "must-haves" (e.g., expanded pantry storage, an island breakfast bar, integrated double ovens) and "nice-to-haves" (e.g., a dedicated wine cooler, instant boiling water taps, custom pantry lighting). This distinction becomes invaluable if budget trade-offs are required later.
2. Setting a Realistic Renovation Budget and Contingency
Financial clarity must be established early. According to data published by the National Association of Estate Agents (NAEA Propertymark), average residential kitchen renovations range from £15,000 for standard refreshes to over £50,000 for high-end structural reconfigurations[3].
A vital golden rule in kitchen renovation planning is allocating a 15% to 20% contingency buffer within your overall ceiling budget. For example, if your absolute limit is £30,000, your base budget for design, materials, and labor should be capped at £25,000, reserving £5,000 for unexpected structural, electrical, or plumbing discoveries during demolition.
3. Gathering Inspiration & Showroom Visits
Create visual mood boards via Pinterest or Houzz. Explore diverse kitchen styles—from classic timber shaker setups to sleek, handleless German engineered ranges. Visit kitchen showrooms to touch hardware, test soft-close drawer runs, inspect interior pull-out mechanisms, and view stone worktop slabs under real lighting.
Phase 2: Design, Hiring Professionals, and Site Surveys (Weeks 5 – 8)
Focus: Converting vision into technical blueprints, appointing key trade specialists, and specifying appliances.
Once your budget and aesthetic direction are defined, Month 2 moves from inspiration into precise technical architecture.
1. Appointing Your Design and Construction Team
Depending on the scope of your project, you will need to assemble your team. For straightforward kitchen replacements, a specialized kitchen designer paired with an experienced general contractor or dedicated kitchen fitter is often sufficient. If your project involves removal of load-bearing walls, structural steel insertions, or ground-floor extensions, you will also need to engage an architect or structural engineer.
"The biggest mistake homeowners make is hiring trades before finalizing cabinetry layouts. Your plumbing and electrical positions are entirely dictated by cabinet width and appliance specs—never the other way around."
— David O'Rourke, Master Builder & Guild of Master Craftsmen Fellow
Pro Tip: Vet Your Contractors Early
High-caliber, reputably trade-certified contractors and independent kitchen fitters often book out 3 to 6 months in advance. Securing your chosen builder during Weeks 5–8 is critical to maintaining your targeted installation start date.
2. Precision Laser Site Survey and Layout Floorplans
Your designer or architect will perform an exact 3D laser survey of your existing room. Accurate measurements are critical—a deviation of just 10mm can disrupt handleless unit runs or custom appliance housing towers. During this phase, you will explore multiple floorplan iterations, evaluating classic spatial rules like the ergonomic work triangle (sink, fridge, hob relationship) versus modern zoned functional areas (prep zone, cooking zone, cleanup zone, social hub).
3. Appliance Selection and Technical Specification
Cabinetry design cannot be finalized until exact appliance model numbers are selected. Refrigerators, range cookers, induction hobs with downdraft extraction, and integrated dishwashers all carry unique dimensional tolerance and utility requirements (e.g., dedicated 32-amp electrical spurs, specific waste water heights, or external ducting paths). Selecting appliances in Week 7 ensures your designer works with manufacturer spec sheets rather than estimated generic dimensions.

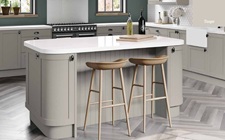
Figure 2: Precision 3D rendering and technical elevation surveys eliminate costly alignment errors during cabinetry fitting.
Phase 3: Permissions, Cabinet Lead Times, and Ordering (Weeks 9 – 12)
Focus: Securing regulatory approvals, finalizing component orders, and locking down the master build schedule.
Month 3 represents the critical transition phase between paper planning and physical procurement. What happens during these four weeks directly governs whether your build runs smoothly or falls victim to painful delays.
1. Statutory Approvals: Planning Permission & Building Regulations
If your kitchen project involves external structural alterations, bi-fold door installations, or building extensions, ensure formal Planning Permission or Permitted Development sign-offs are in hand via the UK Planning Portal. Internal structural changes—such as knocking down a wall between the kitchen and dining room—require Building Regulations approval to ensure structural integrity (RSJ support), fire safety compliance, and proper ventilation.
2. Cabinet Lead Times: The Manufacturing Period
A frequent surprise for homeowners is that quality kitchen cabinetry is rarely sitting on a warehouse shelf ready for next-day dispatch. Custom, made-to-order cabinets carry factory manufacturing and shipping lead times ranging from 6 to 12 weeks.
Understanding Lead Times: Why Procurement Dictates Your Start Date
- Flat-pack / Off-the-shelf Units: 1 – 2 weeks lead time
- Standard Custom Fitted Kitchens: 4 – 6 weeks lead time
- Bespoke / German Engineering Ranges (e.g., Nobilia, Häcker): 6 – 10 weeks lead time
- Bespoke Hand-painted Timber / Joinery: 8 – 14 weeks lead time
Rule of thumb: Never allow demolition to begin on site until your kitchen manufacturer confirms that cabinetry production is complete and delivery to local distribution or site is scheduled!
3. Material Specification and Trade Sign-Off
During Week 11 and 12, lock down every material selection: tile choices, grout colors, wall paint palettes, cabinet door handles, switch/socket faceplates, and quartz or granite worktop door samples. Provide your general contractor with a complete finish schedule to finalize firm, unvariable labor contracts.
Phase 4: Site Preparation and Demolition (Week 13 / Construction Week 1)
Focus: Clearing the space, creating a temporary living setup, and stripping the existing room safely.
Welcome to Construction Week 1! Physical work officially commences in your home. Noise, dust, and disruption will peak during this stage.
1. Establishing a Temporary Functional Kitchen
Before the removal team arrives, set up a temporary makeshift kitchen in an adjacent dining space, utility room, or living room corner. This space should include:
- A microwave, toaster, electric kettle, and portable single/double induction hotplate.
- A mini-fridge or compact freezer to store daily essentials.
- Paper plates, recyclable cups, and minimal cookware (to avoid washing up in bathroom sinks!).
- A designated coffee station and non-perishable pantry crate.
2. Protection and Dust Containment
Professional trades will lay heavy-duty floor protection across access hallways, put up plastic dust zipper doors across doorways, and seal off remaining living zones. Remember that fine brick and plaster dust spreads easily, so covering furniture in adjacent rooms is highly recommended.
3. Rip-Out and Waste Removal
The build crew disconnects existing utilities (gas isolated by a registered Gas Safe engineer, electricity isolated by a certified electrician) and strips out old cabinets, worktops, splashbacks, and unwanted flooring. Skips will be filled and hauled away. By the end of Week 13, your kitchen will be reduced to an empty shell, ready for structural building work.
Phase 5: First-Fix Electrics, Plumbing, and Structural Work (Weeks 14 – 15 / Construction Weeks 2–3)
Focus: Wall modifications, installing hidden utilities behind plasterboard, and floor leveling.
Phase 5 is often referred to as the "rough-in" or "first-fix" stage. While it may feel like little cosmetic progress is occurring, this is the backbone of your entire kitchen's longevity and performance.
1. Structural Work and Wall Alterations
If your project involves removing load-bearing walls to create an open-plan room layout, structural builders will install temporary Acrow props, cut out masonry, and hoist steel RSJ beams into place. Non-load-bearing stud walls are framed out, door openings adjusted, and structural openings prepped.
2. First-Fix Plumbing
Plumbers channel into floors and walls to position fresh copper or barrier-pipe water supply lines and soil waste pipes. They route plumbing to precise positions for:
- Main kitchen sink and undermount prep sinks.
- Dishwasher waste and inlet feeds.
- American-style plumbed water/ice refrigerators or instant boiling water tank units.
3. First-Fix Electrics and HVAC Ducting
Electricians execute heavy cable runs, dropping back boxes into brickwork or stud framing. They install wiring for high-draw appliances (ovens, hobs), LED under-cabinet task lighting circuits, ceiling spotlight positions, island socket pop-ups, and internet data points. Extractor ducting is routed through exterior walls or ceiling voids in compliance with Electrical Safety First UK standards.
4. Wall Plastering and Subfloor Preparation
Once utilities are inspected and approved, walls are boarded with moisture-resistant plasterboard and skimmed with fresh plaster. Plaster requires 3 to 5 days of natural drying time. Concurrently, subfloors are evaluated; self-leveling latex compound is poured over concrete pads, or marine-grade plywood is laid over joists to ensure a flat, stable foundation for incoming floor finishes and heavy cabinetry.
Phase 6: Cabinetry Installation & Worktop Templating (Weeks 16 – 17 / Construction Weeks 4–5)
Focus: Assembling cabinet carcasses, precise leveling, door hanging, and precision worktop measurement.
This phase marks the exciting turning point where your room begins looking like a real kitchen again.
1. Delivery and Unpacking Inspection
Cabinet units arrive on site. Your kitchen fitter will unpack and inspect every carcass, end panel, and drawer pack for shipping damage before installation begins.
2. Cabinet Dry-Fitting and Leveling
Kitchen fitters install base units, high tall-towers, and wall units. Precision is paramount here: fitters use high-grade laser levels to ensure every cabinet is level across horizontal and vertical axes. In older homes where walls and floors are rarely plumb, fitters use scribing panels and adjustable feet to achieve seamless alignment. Appliance housings are fitted, and soft-close drawer runners are installed.
"In solid stone installations, even a 2mm dip across a 3-meter island run will cause quartz slabs to crack under weight. Never rush cabinet leveling."
— Elena Rostova, Chief Stonemason & Surface Fabricator
Understanding the Worktop Fabricator's Golden Rule
If you choose solid stone worktops—such as Quartz, Granite, Marble, or Sintered Porcelain—the tops cannot be pre-manufactured off blueprints. Cabinets must be 100% permanently installed, leveled, and fixed in place on site before a specialist stone fabricator can visit to take precise digital laser templates.
3. Laser Templating for Solid Stone Worktops
On Week 17, the stone fabricator visits your home. Using ultra-precise 3D laser measurement tools, they map out the exact contours of your installed cabinet layout, taking account of wall bowings, sink cutout positions, tap hole punchouts, and drainer grooves. Once templating is complete, there is a mandatory **7 to 10 working day fabrication window** while stone slabs are CNC-cut, polished, and edged in the factory. (If installing laminate or timber worktops, your carpenter can cut and fit them immediately without this delay stage).
Phase 7: Second-Fix Trades, Flooring, and Appliance Integration (Weeks 18 – 19 / Construction Weeks 6–7)
Focus: Fitting stone counters, completing electrical/plumbing connections, and laying final flooring.
With cabinets secured and stone fabrication underway, second-fix specialists return to bring all mechanical systems to life.
1. Floor Laying (LVT, Tile, or Hardwood)
Depending on contractor preference and flooring specification, final floor coverings (such as Luxury Vinyl Tile, porcelain floor tiles, or engineered hardwood) are laid. Subfloor underfloor heating systems (electric mats or hydronic pipes) are tested and commissioned prior to laying flooring.
2. Worktop Delivery and Installation
The fabrication team returns to site to fit heavy quartz or granite slabs. Slabs are seam-joined using color-matched epoxy resins, under-mount sinks are glued and braced underneath, and hot-ring trivet cuts or draining grooves are inspected.
3. Second-Fix Plumbing and Electrical Hookups
With stone worktops installed, trades carry out final connections:
- Plumbers: Connect primary faucets, waste disposal units, boiling water tanks, integrated dishwasher supply lines, and ice-maker water feeds.
- Electricians: Fit stylish faceplates, connect decorative pendant lights above the island, install LED strip lighting profiles under wall cabinets, and hardwire appliances (hobs, ovens, extractors).
Phase 8: Splashbacks, Decorating, and Final Snagging (Weeks 20 – 21 / Construction Weeks 8–9)
Focus: Wall finishes, tile grouting, detail alignment, and project sign-off.
Your kitchen is now 95% complete! The final two weeks focus on aesthetics, detail polishing, and rectifying minor defects.
1. Splashback & Tiling Installation
Tilers install ceramic, porcelain, or marble wall splashback tiles, followed by grouting and flexible silicone perimeter sealing along stone worktop joints. Alternatively, glass or stone sheet splashbacks are measured and bonded directly to finished walls.
2. Final Painting and Woodwork Decoration
Decorators complete fine wall sanding, apply primer coats, and apply final durable, washable kitchen emulsion paint coats. Skirting boards, architraves, door frames, and window sills receive final coats of eggshell or satin finish paint.
3. The Snagging Inspection & Deep Cleaning
Walk through the completed kitchen alongside your main contractor and kitchen fitter with a roll of low-tack painter's tape. Create a formal **snagging list**. Common snags include:
- Cabinet doors requiring fine hinge adjustment for perfect millimeter alignment.
- Minor paint scuffs or touched-up caulk lines.
- Re-sealing small silicone gaps around end panels or skirting.
- Testing every soft-close drawer, pop-up outlet, and appliance zone.
Once all items on your snagging list are resolved, the room receives a thorough deep clean. Your contractor hands over all user manuals, appliance guarantees, and gas/electrical safety certificates. It’s time to stock your pantries and host your inaugural dinner party!
Explore the Kitchen Renovation Masterclass Series
This guide is Part 1 of our comprehensive 10-part kitchen planning series. Deepen your renovation strategy with our companion guides:
- Part 2 (Cost Management): Kitchen Renovation Costs: Where Should You Spend and Where Can You Save? — Master smart budget allocation and avoid costly trade pitfalls.
- Part 3 (Compact Layouts): The Best Kitchen Storage Ideas for Small UK Homes — Maximize cubic footprint with space-saving pull-out larders.
- Part 4 (Cabinet Engineering): What Makes a German Kitchen Different from a Standard Fitted Kitchen? — Unpack the engineering benefits of handleless German ranges.
Expert Advice: How Homeowners Can Prevent Renovation Delays
Even with a realistic master schedule, real-world building projects encounter friction points. Understanding how to proactively minimize delay risks will keep your kitchen remodel on track:
1. Avoid In-Flight Design Changes ("Scope Creep")
The single biggest cause of contractor delays and unexpected costs is modifying layout designs or material choices after work has started on site. Changing a sink position after first-fix plumbing is completed requires tearing down plasterboard, re-routing copper pipes, and paying trades for duplicate labor. Lock in 100% of your choices during Phase 3.
2. Confirm Material Delivery Schedules Prior to Demolition
Do not allow your general contractor to rip out your existing operational kitchen on the assumption that cabinetry or tiles "should arrive next Tuesday." Verify that all major orders—cabinets, appliances, specialized taps, floor tiles—are physically sitting in local distribution centers or garage storage before tearing down walls.
3. Establish Daily Single-Point Communication
Appoint one primary contact person in your household to communicate with your project manager or general contractor. Set up a short 5-minute morning check-in or weekly progress review meeting every Friday afternoon to discuss upcoming trade schedules, material arrivals, and site access requirements.
Frequently Asked Questions (FAQs)
Answers to the most common queries homeowners ask regarding kitchen remodel timelines, tailored for direct featured snippet eligibility:
Q1: How long does a typical kitchen renovation take from start to finish?
Answer: A complete kitchen renovation takes between 12 to 24 weeks total. This comprises 6 to 12 weeks of pre-construction work (budgeting, design blueprints, securing permits, and cabinet lead time manufacturing) followed by 6 to 10 weeks of active on-site physical construction, including demolition, trades, cabinet fitting, stone worktop fabrication, and decorating.
Q2: What stage takes the longest in a kitchen renovation?
Answer: Off-site, the longest stage is **cabinet manufacturing and lead time**, which typically takes 6 to 12 weeks. On-site, the longest phase is the **first-fix trade preparation and subfloor work** (Weeks 2–4 of site work) alongside the mandatory 7–10 day waiting window required for solid quartz/granite worktop laser templating and factory fabrication.
Q3: Can you live in your house during a kitchen remodel?
Answer: Yes, most homeowners remain in their homes during a kitchen renovation by setting up a functional temporary kitchen in an adjacent room with basic appliances (microwave, kettle, hotplate, mini-fridge). However, if your project involves major structural wall removals, extensions, or floor joist replacements, relocating for 2 to 3 weeks during initial heavy demolition and structural steel installation is highly recommended.
Q4: How many days does it take to physically fit kitchen cabinets?
Answer: For an average-sized residential kitchen, a skilled two-person kitchen fitting team takes **3 to 5 days** to assemble, align, level, and securely fit base, wall, and tall cabinet carcasses. Complex bespoke timber joinery or extensive handleless German kitchen systems may require 5 to 8 days of fitting.
Q5: Why is there a delay between cabinet installation and worktop fitting?
Answer: Custom solid stone worktops (quartz, granite, ceramic) cannot be manufactured in advance from drawings due to tiny millimeter variations on site. Cabinets must be 100% permanently installed first. A stone technician then measures the setup using laser templating. Fabricators require **7 to 10 working days** to cut, polish, and edge the stone in their factory before returning to install it.
Q6: What is the typical cost breakdown for a kitchen renovation schedule?
Answer: Industry standards from RICS recommend allocating 35% of total budget to cabinetry and joinery, 20% to integrated kitchen appliances, 20% to professional trade installation labor, 15% to solid worktops, and 10% to decorative finishes, fixtures, and splashbacks.
Q7: What trade comes first after kitchen demolition?
Answer: Structural builders arrive first to install steel RSJ beams if walls have been taken down. Immediately following structural work, first-fix plumbers and electricians channel into bare walls to route new pipework, soil stacks, and electrical wiring spurs before wall plastering.
Q8: How do I prevent budget overruns during a kitchen renovation?
Answer: Maintain a strict 15% to 20% financial contingency fund, select every appliance and fixture model prior to finalizing cabinet orders, and prohibit layout alterations once trade installation has commenced on site.
Cited Sources & Industry References
- Royal Institution of Chartered Surveyors (RICS): Residential Property Renovation Value Insights & ROI Data (2025/2026 Edition).
- Kitchen Bathroom Bedroom Specialists Association (KBSA): Standard Code of Practice & Project Lead Time Guidelines for Fitted Kitchen Installations.
- National Association of Estate Agents (NAEA Propertymark): Home Improvement Market Value Impact Analysis & Budget Guidelines.
- Electrical Safety First UK: Part P Building Regulations Compliance for Kitchen Electrical Installations.
Conclusion: Key Takeaways for a Smooth Kitchen Renovation
Embarking on a kitchen renovation is an exciting journey that dramatically enhances your daily home life and long-term property value. While the process involves multiple moving parts, understanding the structured week-by-week timeline empowers you to stay in complete control of your timeline, budget, and peace of mind.
Remember these cardinal rules for renovation success:
- Plan extensively before starting: Spend at least 8 to 12 weeks designing and procuring before touching a tool.
- Respect lead times: Never start site demolition until cabinet deliveries are verified.
- Build in financial and schedule buffers: Maintain a 15–20% financial contingency and expect a 1–2 week buffer for trade drying/fabrication times.
- Communicate constantly: Work closely with qualified designers, builders, and trades to maintain momentum.

